Loaded Mashed Potato Pizza

mashed potato pizza baked

We used to get a mashed potato pizza appetizer at Pizzaria Uno years ago. But the Uno’s near us closed down a long time ago. Recently, I’ve really been craving it and last night, I had the perfect opportunity to do it. This was really good. I’m definitely making it again.

A couple nights ago, I had tried this AMAZING Creamy Chicken Enchiladas recipe from Num’s the Word. I made a couple changes (used 2 oz of diced Jalapeños rather than 4 oz of green chilis), I also used canned chicken – mainly because I love how easy it is to use canned chicken rather than pull chicken or cut it up finely.

My problem was, I knew that the enchilada recipe would make WAY too much food for 2 of us. (Our eight-year-old was willing to try a bite, but preferred his dinosaur chicken nuggets instead). And since I couldn’t figure out what I’d use 1/2 a can of cream of chicken soup for before it went bad, I just made the entire batch of sauce and decided to reserve it thinking I’d make more enchiladas for lunch the next day. And then while eating dinner, it hit me. This tasted a lot like the sauce you’d get on a mashed potato pizza. So that’s what I decided to do for dinner the next night.

For Sauce:

Reserved about 1/3 to 1/2 part of sauce from the Creamy Chicken Enchiladas or:

  • 1/2 can cream of chicken soup
  • 1 cup sour cream
  • 1 oz diced Jalapeños (optional)

Pizza and Toppings:

Note: if you have leftover mashed potatoes or bacon, this would be SO easy to do.

  • Mashed potatoes –  2 large potatoes, 1 tbsp butter, a generous splash of milk.
  • 1 and 1/2 strips of crumbled bacon
  • 2 cups Mexican cheese – I use Tillamook 4 cheese Mexican blend
  • Thicker pizza crust of your choice – I used a Mama Mary’s


Preheat oven based on directions for your pizza crust. Mine was 425 degrees. Pre-bake your crust for a few minutes until barely light brown. Don’t go too much or it will be too crispy when you bake again. This is just to help it not soak in the sauce too much.

Remove from oven, spread on the sauce. Layer on mashed potatoes, cheese, crumble bacon on top. Put back in the oven for 6-10 minutes. Make sure cheese is melted and toppings are warmed up. (Note: my sauce had been refrigerated, I think it would have been better if I’d reheated it on the stove prior to spreading on pizza. Not reheating first made mine take a couple minutes longer.)

I also made a bacon and mozzarella pizza using a Caulipower Pizza Crust to go with this.

Chicken or Turkey Croquettes

This is a recipe that my mother-in-law makes for my husband, Mike, every time we come to visit. It is his comfort food. She will make this using left-over Thanksgiving turkey or canned chicken. If you have a food processor or the Tupperware Ultimo Smart Chopper, it makes getting the right consistency on the meat a snap.

I don’t have the time to make this in one day. So what I’ve done is get to the part where you are refrigerating for the second time – after it’s been formed into balls –  and then I just leave that overnight. Frying the next day takes almost no time. I think she got this original recipe from an old Betty Crocker cookbook but she’s changed a few things over the years.

Ingredients:

1 cup of Thick White sauce (for mixing with chicken or turkey)
2 cups of ground or finely shredded chicken (canned chicken or leftover turkey work great)
1 TBS of minced onion
1 Tsp of snipped parsley (optional)
salt and pepper
1 egg
2 TBS of water
1/4 cup of dry bread crumbs
Veloute sauce (to spoon over the top of the croquettes)
Serve peas on the side.


Prepare Thick White sauce, stir in meat 1TBS minced onion and parsley. Season with salt and pepper. Spread the mixture in an ungreased square pan, 8x8x2. Cover and chill 2 to 3 hours.

Divide into 12 equal parts and shape into balls. Beat egg and water until blended. Dip each ball into egg mixture, then roll into bread crumbs till completely coated. Flatten slightly to make disks, but keep them tightly packed. Cover croquettes and chill at least 2 hours.

Fry croquettes in butter. –This is the South, people, use butter for frying this dish. I started to fry this in avocado oil and realized quickly this is not a dish for trying to be healthy. Fry a couple minutes until light brown, remove and keep warm in a 350-degree oven until ready to serve.

Serve with a side of peas and the Veloute Sauce on top.

Thick White Sauce
For each cup sauce
1/4 cup of butter
1/4 cup flour
1/4 tsp salt
1/8 tsp pepper
1 cup milk

Melt butter in a saucepan over low heat. Blend in flour salt and pepper. Cook over low heat, stirring until mixture is smooth and bubbly. Remove from heat, stir in milk. Heat to boiling stirring constantly. Boil and stir 1 minute. Sauce will thicken.

Veloute Sauce
2 TBS butter
2 TBS flour
1 cup of chicken broth
1/4 tsp salt
1/8 tsp pepper
1/8 tsp nutmeg

Melt butter in a saucepan over low heat. Blend in flour cook over low heat stirring until smooth and bubbly. Remove from heat stir in broth. Heat to boiling, stirring constantly, boil and stir 1 minute. Stir in seasonings.

Air Fryer Veggie Egg Rolls

I love fried foods. If I could eat them for every meal, I would. But, I also would like to live long enough to see my grandchildren. So we’ve been trying to eat a bit healthier and make some small changes. One of my favorite things to make is egg rolls. But with meat and deep frying, we wanted to try something different. We recently bought a Ninja Air Fryer. I’ve only used it twice so far and I do like it for these two reasons:

  1. The basket and inside parts are dishwasher safe!
  2. The basket is large enough that you can put in an entire bag of frozen french fries at once.

So last night, I decided to try some veggie egg rolls.

cooked eggrolls

Ingredients:

  • Shredded cabbage (about 1 small head)
  • Shredded carrots (to taste, about the proportion you’d use in coleslaw)
  • Finely chopped green onions
  • Chopped zucchini or squash (1 medium-sized)
  • Egg roll wrappers (I use Nasoya brand, available in most grocery stores)
  • Pam Olive Oil

Cut up all the veggies and line them up into bowls to make an assembly line. Get a small bowl of warm water for closing the wraps. See the previous egg rolls recipe for how to assemble the egg rolls. Apologies for my photos here. I was packing these pretty full so mine ended up more square than tubular. It does not affect taste, just looks.

Tip: Don’t assemble all the egg rolls at once. Get four of the egg rolls assembled and starting to cook and then start assembling the rest. By the time you are done with the next few egg rolls, the first batch will be cooked.

Cooking:

You can fit about 4 egg rolls per batch in the basket. (I had one left over for the last batch and squeezed 5 in, but 4 does work better).

eggrolls cooking

I pre-heated my fryer at 390 degrees for 3 minutes – the same as I did for frozen french fries.

Spray the basket with olive oil (vegetable oil works too, but olive is better for you).

Spray one side of your egg rolls with oil. Place the oiled side down in the fryer basket. Then spray the other side of your egg rolls with oil. You don’t need to soak them. Just a light coating.

Play with your fryer. I found one recipe online that suggested 390 degrees for 6 minutes, flip and then do another 6 minutes. My egg rolls looked almost burned after the first 6 minutes doing this. After playing a bit, I found that for my Ninja Air Fryer, the ideal was:

  • 390 degrees for 4 minutes, flip with rubber tongs, and then cook an additional 4 minutes.

Keeping warm:

Since there are 8 minutes for each batch and you end up with about 5 batches, the total time for this takes about 40 minutes. I didn’t want my first batch of egg rolls to be cold by the time I finished. So put them on a pan and turned the oven on. I did mine way too hot at 350 degrees and we had to definitely let the egg rolls cool for several minutes. I’d suggest putting it at about 250 degrees for the egg rolls to keep warm.

Honesty moment:

These were good. They were not as good as the ones I make that are deep fried in a pan full of oil. But the difference was small enough that I can live with it. And that’s the point, isn’t it?

My Favorite Tools for Making Guacamole

My family LOVES guacamole. My husband and I will gladly get table-side guacamole for $8 and then just eat it as lunch (sometimes we each get our own). But I really hated making guacamole at home. I didn’t like dulling my knives, or risking a cut, by slamming the blade into the avocado pit. It was a pain in the neck to get it that right consistency of chunk and mush combo with a big spoon. But I decided to keep at it. Mainly because I got some home-grown avocados from a Florida friend and then Kroger began selling them for 69 to 79 cents a piece. And I have now found the EASIEST way ever to make guacamole. It’s so easy, I’m making it about once a week.

Alton Brown said it best that you should never have a uni-tasker in your kitchen. So I started to look for tools I already had that would make my guacamole experience less of a pain. I came up with two. Here they are.

guac tools
A Potato Masher and an Ice Cream Scoop

Yep, these two things make doing guacamole way easier. So here’s the recipe.

What you need:

  • 4-5 avocados (if you have the big Florida ones, 1-2)
  • 1 small “on the vine” tomato
  • 1/3 onion (red or sweet)
  • 1/2 green pepper
  • 1-2 jalapeño peppers
  • 1 lime (I use the juice from the whole lime)
  • Cilantro (if desired)
  • Sea salt and pepper to taste

Note, You won’t see cilantro in the image above because it’s too much of a pain to wash, dry and chop for me. I love it in restaurant guacamole, but am too lazy to do it in my homemade guac. I don’t think I’m missing much.

guac pit

Chop the onion, peppers, and tomato first and set aside. I’ve been told to squeeze the lime juice into the onion to pickle it prior to putting it into the mashed avocado. I really don’t see a big difference in taste, but there’s a tip for you.

Slice around the entire avocado and then twist to open it so you have two halves. Use the ice cream scoop to scoop out the pit.

guac pretty

Then, use the ice cream scoop to scoop out the avocado. If you’re careful, you get a really pretty avocado half and the

skin looks good too.

Once you have all the avocados out of the skin, put them in a bowl and get ready to mash.

guac stuffYou don’t want to mash these much. I find just putting the masher through each piece once or twice gives me the consistency I like. But do it however you prefer. You can see that I leave mine pretty chunky.

When you stir all the veggies in, it will get a bit more mushed, so keep that in mind. After you’ve mashed it, add in your other veggies and lime juice. Then sea salt and pepper to taste. And yes, you do need to taste it multiple times to make sure it’s ok.

And this is how the guacamole looks after it’s mixed all together. You can see that it does end up a bit less chunky with all the stirring. As for eating, this makes a pretty large helping. Guacamole does not refrigerate well. It is still edible the next day, but it gets brown. So plan on eating it all at once. You can also divide this recipe in half and have enough for sides.

guac finish

In Search of the Perfect Breakfast Cookie: Part 1 – Banana and Chocolate

Originally, I was searching for kid-friendly breakfast cookies I could make for my son now that he’s a kindergartner. Sometimes, I think he must be an alien. He does not like pizza, bananas, and absolutely has hated applesauce since he was a baby.

After trying several recipes that he absolutely hated but that I thought were fine, I have given up on finding him a breakfast cookie he liked and started looking for one I liked instead. Luckily, he’s happy with a rotation of peanut butter apples, toast with peanut butter and honey, and cereal in a mug that he can eat on our way to school. My kid LOVES peanut butter.

I learned my eating habits from my mom. My mom was a working mom. She’d be stressed out trying to take care of all us kids as well as get ready for work and get us to school somewhat on time. I remember a few times being handed Little Debbies and being told, “it’s the same as a donut!” So I have not ever had much of an issue with eating junk food in the morning. But that needs to change. And maybe, one day, I’ll be able to convince the kid to eat something as easy as a breakfast cookie so I don’t have to clean up smeared peanut butter from his car seat every day.

Here’s where my journey began a few months back. I went to Pinterest, as every guilt-ridden working mom does. What I discovered is a bunch of complicated breakfast cookies and every single one seems to have bananas and applesauce as a prime ingredient. Two things my kid hates.

But I thought I could trick him. I almost succeeded. My problem was, that all the recipes I found called for flax seed (which we were out of), uncut oats (all I had was Quick Oats), and other healthy things I didn’t have – it’d been a while since our last grocery run. Plus, they all wanted the banana to be the star of the cookie. I needed to cover that taste up as much as possible.

So I looked at a few recipes to see how much ratio of banana to oats might work to hold the thing together and decided to create my own recipe. These cookies actually got a 1/2 a cookie eaten and the comment of “it’s not too bad” from my son. For me, that was a win. For those of us in the house who DO like bananas, we thought these were quite tasty. They were good enough that I didn’t get a chance to take more than one picture.

The next time, I made a recipe that didn’t call for bananas. I’m making a recipe that doesn’t have bananas. You could still slightly taste it.

chocbananacookies

Banana and Chocolate Breakfast Cookie

  • Prep Time: 10 minutes
  • Cook Time: 15-18 minutes
  • Yield: 10-12 large cookies
  • Serving Size: 1-2 cookies

Ingredients: 

  • 4 TBSP Honey
  • 3 1/2 TBSP Oil
  • 2 large eggs
  • 1 tsp Vanilla extract
  • 2 small mashed up bananas
  • 2 cups quick oats
  • 1/4 cup peanut butter
  • heaping 1/2 cup chocolate chips (probably ends up being about 3/4 cup)
  • 2 heaping TBSP Nutella
  • 3/4 tsp cinnamon
  • 1/4 tsp salt

Directions:

Note: You can do this by hand or use a mixer. I used a mixer because I’m lazy. But I tried stirring it, and it’s fairly easy to do.

  1. Preheat oven to 325F.
  2. In a large bowl combine honey, oil, and eggs. Stir.
  3. Add vanilla and mashed bananas. Stir.
  4. Add oats, peanut butter, Nutella, cinnamon, chocolate chips, and salt. Stir.
  5. Use a serving spoon or a 1/4 measuring cup to scoop out a cookie. This should make between 10-12 large cookies.
  6. Bake for 15-18 minutes. Mine took about 18 minutes.

These cookies end up looking a lot like Chocolate Peanut Butter No-Bake Cookies. But remember, these have eggs in them. They need to bake! And because of the bananas and eggs in them, I’d refrigerate leftovers to be safe.

Review: Blue Apron

Cooking is not my favorite thing in the world to do. I enjoy cooking special meals at Christmas or Thanksgiving, but those day-in, day-out meals drive me absolutely insane. It literally makes me angry having to cook because I don’t want to figure out what I want to make,  have to shop for (and then not find) all the ingredients I need, clean up prior to cooking, go to the effort of cooking, and then clean up after cooking. It’s just not fun. But, we are trying to eat healthier and eat at home more often. So talking to a friend that I was thinking about trying Blue Apron out, I discovered that she did it and had a free week for me to try. So I did. I was hooked. We’ve now been doing Blue Apron for a few months and I am LOVING it. The meals feel fancy as I’m cooking, but don’t take so long that I feel I can’t get it done on a week night.

muffalatta grilled cheese
Muffuletta Grilled Cheese. I don’t like olives, but I LOVED this dish.

All the food is pre-measured for you. Each meal is perfectly proportioned and sized for what you need. The only thing they don’t provide is the olive oil, salt/pepper, and pan to cook it in. If a meal requires you to bread chicken in flour, they include a little baggy full of flour for you to bread the chicken. The instructions have lovely pictures and easy to follow steps. BBQ sauce comes in a cute little bottle that the frugal person in me wanted to wash out and bring to daycare for the kids to play with. (Mike said they would not want a used BBQ bottle, no matter how clean, but it was so cute). Vinegar comes in even tinier little bottles that would be great for art projects. I love how I don’t have to go to the store when I want to make something and look for ingredients, realizing that I have to get enough to make a meal for five people because that’s the smallest size I can buy and then have a ton of left overs that I end up just throwing away a week later, or worse, Mike and I eat portions that are way too huge.


Even how the food is packed and sent through the mail is impressive to me. We started this journey at the beginning of summer. Since we don’t get home from work until late, the box would sometimes be sitting in the sun on our front porch for four to five hours before we could bring it inside. Only once, when the temperature reached into the high 90s and I didn’t get home until after 6p.m. did I feel that the food had gotten almost-too warm. The meat is sandwiched between reusable freezer bags that are made from a water-based solution. Once you’re done reusing them, (or have gotten so many you don’t need more), just cut it open with scissors and put it down the drain. Everything is recycleable. The insulation packaging around the food looks a lot like a car’s sunshield. It has come in handy as a way to block sun in the catio.

chicken burger
The burgers have been GREAT. Not a fan of baked fries, though. Next time, I’ll make potato salad with them instead.

Finally, the taste. Every single dish we’ve tried has been high quality food. In the months since we’ve started trying these new dishes, we’ve not had a single repeat. Only two of the dishes have been instances where I felt that I wouldn’t want to eat them again. Both times, it was things that were good quality, just not really my cup of tea.


fresh lettuce
This lettuce literally came with the roots in a pot.

I’ve also found out that my friend and I are not the only ones at work who are hooked. I’ve spoken to 11 women at work about this; six of us are using Blue Apron almost weekly. And that’s the other nice thing. If you don’t need the food one week because of vacations or travel, or you’re just not really interested in the menu that week, you can cancel. That right there is the reason I gave up on Dinner A’faire. I hated having to spend a couple hundred dollars per month on frozen meals that I might not end up having time to make. With Blue Apron, everything is fresh, not frozen. I am able to plan my month out and cancel when I know I won’t have time to fix anything. The fish is sustainable, the meat doesn’t have a bunch of hormones. It’s good quality.


I really do love Blue Apron. On those weeks where we don’t get it, I find myself missing it.

Cooking adventures with The Boy

apronOur son is 3.5 years old. He’s at the age where he wants to learn and do things “all by myself!” but still needs help. There’s one thing I love to have him help with and that’s cooking dinner. I want him to know that boys can cook. I want him to know how to make food for himself and be independent, and I want him to know what it takes to get his food prepared. He’s been helping me a lot lately and I realized something early on that makes me really encourage him to help me cook. He loves to eat the food he’s made himself. He’s willing to try new things. He loves going out with me to the container garden and picking a tomato and then (if it lasts that long and isn’t eaten first) seeing that tomato end up on the table in a dinner he’s helped to make.

One of our favorite things to make together is pancakes. He does everything once and then “lets” me take over. We talk about how much Bisquick mix we need. He gets to stir, pour it out on the pan and flip the pancakes when done. If we’re in the mood, he sprinkles chocolate chips on some of them.  I even let him flip the bacon the first time (before it starts to really sizzle and pop).

Yesterday, he got his first “burn.” We’d been talking about not touching hot pans. I’d just turned the pan on and it was beginning to warm up. I warned him several times to not touch. But, I also decided to step back a bit and see what he’d do. As I suspected, he reached out and lightly brushed the end of the pan with his finger. He jumped back to show me his “burn” and we dealt with it. The pan was just barely warm and the “burn” was not even a red spot. (By the time we turned around to the sink to run cool water over it and get the medicinal Mama kiss, neither of us could remember which finger was actually “burned.” We finally settled on the right since that had been closest to the pan). I hope it was enough for him to understand not to touch, though. He could tell that the pans continued to heat up. Considering they are talking about the five senses this week in daycare, I’m wondering if he’ll mention this incident for “touch.”

Yes, having my helper makes it harder to get dinner on the table. But it is so much fun. We are learning about hand-washing before food prep and washing after touching raw meat and eggs. We’re learning what food looks like cooked and un-cooked. He’s learning that there are ways to measure things and how to be careful so we don’t make too big of a mess – though some mess is required and the cooks definitely get to sample the chocolate chips. But he’s also learning that he’s part of the family and has responsibilities to help. All this and the memories are priceless.

Easy Homemade Donuts

chocolate covered donut
Chocolate frosted

My mother used to make us donuts at home. They were delicious. She’d mix the dough and spend the time to deep fry them. Then, we’d all choose our toppings from an array that she’d mix up from a base powdered sugar mixture. It’s one of my favorite memories from childhood. I decided this would be one of the memories The Boy would have of his childhood. But I don’t have the time or inclination to mix up donut dough from scratch. Thankfully, cans of Pillsbury Grands Homestyle Biscuits exist.

To make easy homemade (and delicious) donuts at home, you’ll need

  • The biscuit dough
  • Frying oil (I usually use the leftover peanut oil after I’ve made eggrolls)
  • Flavorings (like: maple, almond, vanilla)
  • Other toppings (like: cake frosting, cocoa powder, crushed nuts, sprinkles, etc.)
  • Milk (if you don’t have milk, you can use water, but the glaze tastes like it’s missing a little something)
  • Powdered Sugar

Making the Donuts

maple frosted donut
Maple frosted
  1. Open the can of Pillsbury Homestyle Biscuits
  2. Use a cap from a bottle, or a 1/4 cup measuring cup to pop a hole out of the center
  3. In a pan of hot oil, drop the donuts and donut holes a few at a time. Flip after they are golden brown on the bottom.
  4. After frying on both sides, remove from the oil and drain.
  5. While the donuts are still warm, dip them in your favorite toppings.

Making the Donut Toppings

array of donut toppings
From top to bottom: maple, powdered sugar, plain glaze, melted chocolate frosting


  1. Get a large bag of powdered sugar
  2. Split off a small bowl for just plain powdered sugar
  3. Mix the rest of the powdered sugar with milk to make a plain glaze. (This is what your Krispy Kreme donut is covered in)
  4. Split the plain glaze into several bowls,  depending on what flavors you like.
  5. Here is what we usually do:
  • Leave one bowl plane
  • On the second bowl, add a small amount of maple flavoring (or syrup if that’s all you have)
  • On the third, add cocoa powder (if you’re out of cocoa powder, a chocolate can of cake frosting microwaved for a few seconds until it’s melted makes an AMAZING chocolate frosting for donuts. That is what the chocolate donut above is covered in).
  • Line the bowls up into an assembly line and let everyone choose their own toppings.

Black and White Brownie Pops

image

I needed something easy to make but interesting for our Memorial Day picnic at church recently. I had eaten some brownie pops that my best friend sent me from  Shari’s Berries for Valentine’s Day and was craving them again. The brownie pops they created were adorably cute (and extremely delicious) lady bugs where the head was a dipped cherry. browniebitesMy brownie pops were very simple since I didn’t have a lot of time to make anything complicated, but it would be fairly easy to do more with these. If you are looking for a place to order from though, I can tell you the quality from these and the chocolate covered strawberries she sent me were great.

Ingredients:

  • Brownies (I just made a box mix) – make sure you bake them for the bare minimum time so they are still gooey.
  • Powdered sugar
  • Dipping chocolate – there are many brands, follow the instructions for melting the pieces. I used Marzetti’s chocolate fruit dipping pieces because that was what I had at home.
  • Cookie sheet covered in wax paper

Instructions:

Cut off the edges and scrape the brownie out of the pan immediately after removing it from the oven. Put it in the refrigerator for a few minutes to cool it off, enough so you can handle it, but take it out while still warm.

imagePull off pieces of the brownie and roll them in your hands to make large gumball sized balls. (about 1 inch in diameter)

Refrigerate or freeze the balls when done to firm them up.


Take 1/2 of the balls for dipping in chocolate and the other 1/2 for dipping in powdered sugar.

image imageUsing tooth picks, roll the balls in your chocolate dipping sauce.
Put them on the waxed paper covered cookie sheet to drip. After you are finished dipping all the chocolate balls, put this pan in the refrigerator to firm up the chocolate completely.

Take the rest of the balls and roll them in the powdered sugar.

imageimage


After the chocolate balls are firmed up, place all of them on the plate and enjoy!image

Tip: The chocolate covered balls did eventually start to get a bit sticky in our summer heat, though the powdered sugar ones did fine. But this would probably be better for an indoor party.

American Egg Rolls

I don’t cook often, but I do enjoy it every once in a while. When I do, I tend to go for odd meals. They don’t always follow the meat and two veggies, plus starch that my mom always made. The other day, I decided to make egg rolls. These are my take on egg rolls. I call them American egg rolls because you can really put anything you want in these. This particular recipe is the Asian inspired flavor for egg rolls. I’ve also done a Mexican inspired flavor for these where I take seasoned ground beef, corn, beans, and a bit of cheese and make a Tex-Mex variation. Play with the ingredients however you wish.

egg rolls

Frying Ingredients:

  • Use a fairly large stainless steel frying pan for these. Don’t use a non-stick pan. At the temperatures you’re going to have your oil at, there is a risk that some of the chemicals in a Teflon covered pan might leach out.
  • Peanut Oil. This is not a healthy dish. Don’t ruin it by trying to make it healthy using some other oil. Go for the stuff they use in the restaurants – it tastes better. (you can find this in the baking aisle of your grocery store)
  • Tongs
  • Paper towel covered cake pan (when removing egg rolls, stand them on end leaning on the sides of the pan to better drain)
  • An apron. Or else wear a shirt you don’t care about, but you will get oil stains on it.

Egg Roll Ingredients:

Tip: I use the TupperWare Chop ‘N Prep Chef chopper to shred the cabbage, carrots and chicken. This is one of the best gifts I’ve ever received. Definitely makes shredding the ingredients really easy and quick.

  • Egg Roll wrappers (I buy Nasoya brand, available in the organic section of the regular grocery store)
  • 1 head red cabbage (shredded)
  • 1 cup carrots (shredded)
  • 1 package shredded pre-cooked chicken. (I buy either Perdue Short Cuts or Tyson Grilled and Ready in the 10 oz package, whichever is on sale)

Assembly:

Mix the shredded cabbage and shredded carrots in a bowl.

Tip: You will not be using all the cabbage/carrot mixture. Think about splitting this in half and using the reserved 1/2 to make homemade coleslaw.

Create an assembly line. Put the wraps first, then, the cabbage/carrot mix in a bowl. Next, Put the shredded chicken in another bowl. Get a bowl of WARM water at the end.

Tip: Make sure you keep the water of the assembly process away from your pile of wraps.

Remove one wrap from the pile and lay it in front of you as if it were a diamond shape with the bottom pointing at you. Add a heaping tablespoon full of cabbage/carrot mixture to the middle of the wrap. Add a heaping teaspoon of chicken to the pile. Dip your fingers into the warm water and moisten the bottom edges of the diamond. Take the two side points, and connect them together. Take the bottom point and press into the folds of the side points. You have now created what should look like an open envelope.

LlubNek-Open-Envelope

Lift this up and gently shake to get all the ingredients below the fold. Then, as tightly (and gently) as you can, roll from the bottom and use a bit of water to seal the top of the envelope. Don’t worry if you rip it. One thing you can do, is seal most rips by moistening the tear and squishing them back together. If you have a really bad tear, you can sacrifice one wrapper to become the “tape” to hold others. Just moisten a strip off of a wrapper and plaster it on top of the tear.

Don’t pile assembled egg rolls tightly. They’ll stick together.

Frying:

Fill your frying pan with peanut oil about one inch deep. Try to have a pan large enough that you can fit four to five egg rolls at a time with plenty of room for them to move around. Otherwise, you’ll be frying all night. Heat the oil to the point where a TINY drop of water will fizzle away quickly. Be careful! If you flick too much water in very hot oil, you will hurt yourself. Just drop a bit of water off the tip of your finger to test. If you see smoke on your oil, turn the heat off immediately. Once the oil is hot enough, begin placing your egg rolls. Do this part slowly. Don’t drop them in. You do not want to splash hot oil on yourself.

Watch the first batch very carefully. Turn them over when the fried side looks to be getting close to golden brown. Use your tongs to flip the egg rolls and cook the opposite side.

Tip: if you see a thin side to the egg rolls, cook that side first, that will help cut down on giant bubbles forming that will make them want to not stay flipped over. If you get an egg roll that keeps trying to flip over, hold it with a fork in the position you need for a few seconds until the air has had a chance to move around and the egg roll no longer tries to flip back over.

Once the other half has been fried, use the tongs to remove the egg rolls from the oil. Give it a few seconds above the oil to drain off the oil (turn the egg roll different ways to ensure you’ve gotten most of the oil off) then move to your paper towel covered cake pan. Use the sides of the cake pan so that you can drain the egg rolls by standing them up on end. This helps get most of the oil out.

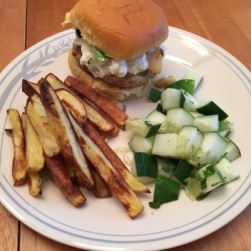
Egg rolls should be golden brown. Apologies on the picture above, I kept getting interrupted on this batch so they got a bit more done than they normally would be – but they were still delicious.

Tip: Watch the temperature of your oil. If your egg rolls begin cooking too fast, turn the heat down. Don’t leave these unattended. They can burn very quickly.

Serving Suggestions:

We like using hot mustard and soy sauce. You can try sweet and sour sauce as well.

Makes about 25

One last note about the peanut oil. You can re-use this a time or two if you’re going to be frying in the near future (refrigerated biscuits dough make yummy fried donuts). Once you have let the oil cool for a couple hours, you can put it in a container. I suggest taking a large container and using a paper towel to create a sieve. Don’t put the towel on top tightly, let it sag a bit like a bowl so oil can drip through. SLOWLY pour some of the cooled oil into the paper towel sieve. Let that drip down into your container. Seal it tightly and re-use it. If your oil has changed color or overheated, you may not want to do this. Make sure you’re wearing your apron when you do this.