New York City with a 9-Year-Old Boy

This image has an empty alt attribute; its file name is statue-of-liberty.jpg

We had not had a vacation since before COVID struck. We were in desperate need of a vacation. But where to go? We had a too-young-to-be-vaccinated child. We did not want to fly anywhere. We decided to visit some of my family and my best friend in Connecticut. Considering how often we get up that way – especially since with stops it’s about a 16-17 hour drive – we decided to stop in New York City for a few days as well. One reason was that we felt more confident with the vaccine requirements for restaurants up there than places closer to home.

It’s surprisingly difficult to find things to do with a boy in NYC when you don’t have a lot of time and don’t want to spend a fortune. There’s plenty to talk about with stores or plays that girls want to see. But when you’re trying to stay socially distanced as much as possible, it can be hard. We had three days. Here’s a few things that we did.

Statue of Liberty

This was wonderful! The last time I’d visited the Statue of Liberty, she’d been taken apart for repair. So getting to see the original torch, heading up into the Pedestal section, and then getting to see Ellis Island was wonderful. Our son really enjoyed it. He loved hearing the stories of immigrants, seeing how high up we were – even though we couldn’t go all the way to the top, and learning and seeing the pieces of the statue up close to really understand just how large she really is.

This image has an empty alt attribute; its file name is natural-history-museum.jpg

Tip:

Make sure you order your tickets from Statue Cruises and not someplace else. I was warned several times by folks that there are some fake places to buy from. To make sure I was ordering from the correct place, I started out from the National Park Service website and went from there.

Know that if you are climbing into the statue, you are CLIMBING. The elevator is only for folks who have disabilities. Those of us who are just middle-aged still have to walk. I felt better not being the only one who needed to stop a couple times for a breather. It’s 162 stairs. That’s more than 10 flights of stairs.

American Museum of Natural History

My son had first heard about this place from a Wild Kratts episode a few years back and it’s been on his bucket list ever since. They were having an amazing showing of different minerals and geodes that he just loved. The blue whale is awesome and the planetarium is great.

Tip:

Download their app. It made finding the bathrooms and different displays a lot easier. The app included such detailed information when telling you where to go that it would describe the pattern on the floors as you were walking. Very helpful. Also, there’s a nice little spot next to a restroom that has a film on a loop. Good place to sit for a few minutes when you’ve been walking for hours.

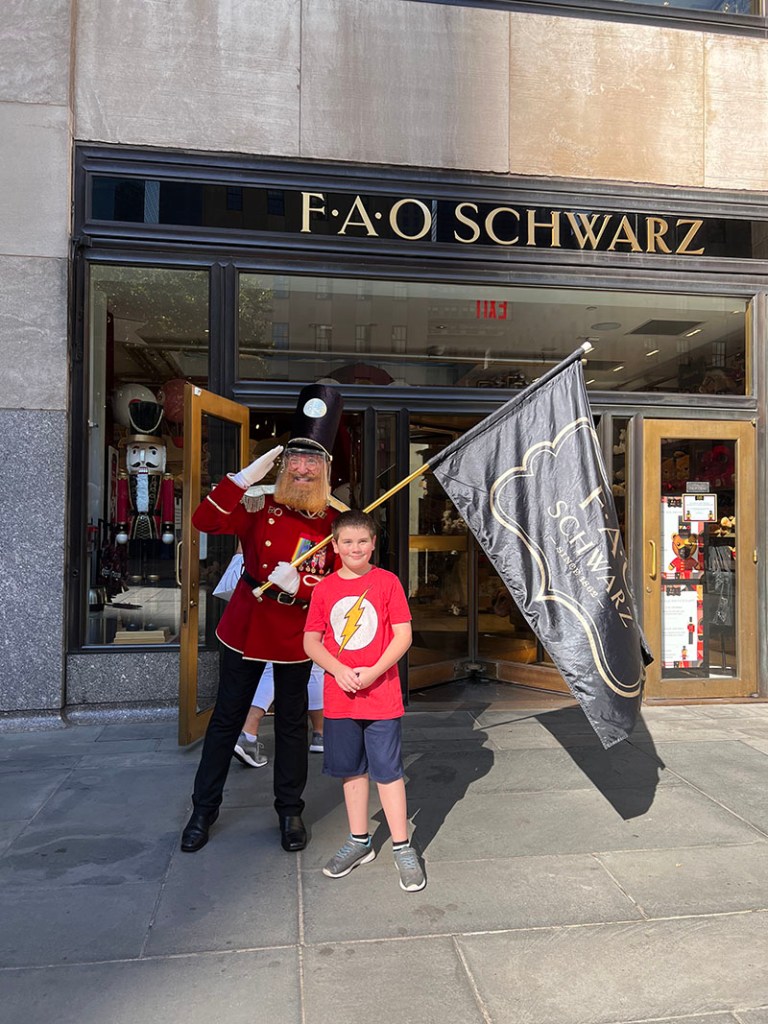
FAQ Schwarz Private Tour

This was something that my best friend treated us to. She met us in NYC and introduced us to Toy Soldier Roy who was AMAZING! He was by far my son’s favorite person he met on the trip. We met Roy before the FAO Schwarz store opened to the public and Roy told us the history behind the store. He gave us a great personal tour of the store and our son even got to raid the schweet shop. This was our son’s favorite part of the trip. At the end of the tour each participant also got a small FAO Schwarz bear and, of course, each of us has named our bear “Roy.”

This image has an empty alt attribute; its file name is fao.jpg

Tip:

I didn’t even know you could do this. So it’s good to have a friend who knows things like this. 🙂 Seriously though be prepared to have fun. Make sure everyone doesn’t have a hole in their sock because you also get to dance on the Big piano. After the store is open, understand that you WILL need to also buy a toy because you can’t do a tour of a toy store and then tell your kid they can’t buy a toy. It is also good to have a couple of adults so that if there is a toy you want to get for Christmas, one of you can go buy it sneakily while the other is watching the kid watch all the wonderful demos.

Other Fun Things

Surprisingly, our son really enjoyed seeing the artwork in St. Patrick’s Cathedral. We also played with the sound in the arches in Grand Central station (go to the Oyster restaurant and stand diagonally at the arches. Then whisper or talk into one arch and the diagonal person can hear you as if you’re inside the arch), we went to the LEGO store, and also paid $10(!) for an ice cream cone from an ice cream truck. We did a few other things, but those were some of the highlights.

General Tip:

If you have a picky eater like us, Shake Shacks are everywhere. We did a couple meals where we bought him a hamburger, fries, and a shake then we got to go to a real Italian restaurant and eat wonderful food. (Our son commented at one place that they didn’t even provide real napkins, just big pieces of cloth, that made us all laugh and realize we need to eat at nicer restaurants).

Loaded Mashed Potato Pizza

mashed potato pizza baked

We used to get a mashed potato pizza appetizer at Pizzaria Uno years ago. But the Uno’s near us closed down a long time ago. Recently, I’ve really been craving it and last night, I had the perfect opportunity to do it. This was really good. I’m definitely making it again.

A couple nights ago, I had tried this AMAZING Creamy Chicken Enchiladas recipe from Num’s the Word. I made a couple changes (used 2 oz of diced Jalapeños rather than 4 oz of green chilis), I also used canned chicken – mainly because I love how easy it is to use canned chicken rather than pull chicken or cut it up finely.

My problem was, I knew that the enchilada recipe would make WAY too much food for 2 of us. (Our eight-year-old was willing to try a bite, but preferred his dinosaur chicken nuggets instead). And since I couldn’t figure out what I’d use 1/2 a can of cream of chicken soup for before it went bad, I just made the entire batch of sauce and decided to reserve it thinking I’d make more enchiladas for lunch the next day. And then while eating dinner, it hit me. This tasted a lot like the sauce you’d get on a mashed potato pizza. So that’s what I decided to do for dinner the next night.

For Sauce:

Reserved about 1/3 to 1/2 part of sauce from the Creamy Chicken Enchiladas or:

  • 1/2 can cream of chicken soup
  • 1 cup sour cream
  • 1 oz diced Jalapeños (optional)

Pizza and Toppings:

Note: if you have leftover mashed potatoes or bacon, this would be SO easy to do.

  • Mashed potatoes –  2 large potatoes, 1 tbsp butter, a generous splash of milk.
  • 1 and 1/2 strips of crumbled bacon
  • 2 cups Mexican cheese – I use Tillamook 4 cheese Mexican blend
  • Thicker pizza crust of your choice – I used a Mama Mary’s


Preheat oven based on directions for your pizza crust. Mine was 425 degrees. Pre-bake your crust for a few minutes until barely light brown. Don’t go too much or it will be too crispy when you bake again. This is just to help it not soak in the sauce too much.

Remove from oven, spread on the sauce. Layer on mashed potatoes, cheese, crumble bacon on top. Put back in the oven for 6-10 minutes. Make sure cheese is melted and toppings are warmed up. (Note: my sauce had been refrigerated, I think it would have been better if I’d reheated it on the stove prior to spreading on pizza. Not reheating first made mine take a couple minutes longer.)

I also made a bacon and mozzarella pizza using a Caulipower Pizza Crust to go with this.

Chicken or Turkey Croquettes

This is a recipe that my mother-in-law makes for my husband, Mike, every time we come to visit. It is his comfort food. She will make this using left-over Thanksgiving turkey or canned chicken. If you have a food processor or the Tupperware Ultimo Smart Chopper, it makes getting the right consistency on the meat a snap.

I don’t have the time to make this in one day. So what I’ve done is get to the part where you are refrigerating for the second time – after it’s been formed into balls –  and then I just leave that overnight. Frying the next day takes almost no time. I think she got this original recipe from an old Betty Crocker cookbook but she’s changed a few things over the years.

Ingredients:

1 cup of Thick White sauce (for mixing with chicken or turkey)
2 cups of ground or finely shredded chicken (canned chicken or leftover turkey work great)
1 TBS of minced onion
1 Tsp of snipped parsley (optional)
salt and pepper
1 egg
2 TBS of water
1/4 cup of dry bread crumbs
Veloute sauce (to spoon over the top of the croquettes)
Serve peas on the side.


Prepare Thick White sauce, stir in meat 1TBS minced onion and parsley. Season with salt and pepper. Spread the mixture in an ungreased square pan, 8x8x2. Cover and chill 2 to 3 hours.

Divide into 12 equal parts and shape into balls. Beat egg and water until blended. Dip each ball into egg mixture, then roll into bread crumbs till completely coated. Flatten slightly to make disks, but keep them tightly packed. Cover croquettes and chill at least 2 hours.

Fry croquettes in butter. –This is the South, people, use butter for frying this dish. I started to fry this in avocado oil and realized quickly this is not a dish for trying to be healthy. Fry a couple minutes until light brown, remove and keep warm in a 350-degree oven until ready to serve.

Serve with a side of peas and the Veloute Sauce on top.

Thick White Sauce
For each cup sauce
1/4 cup of butter
1/4 cup flour
1/4 tsp salt
1/8 tsp pepper
1 cup milk

Melt butter in a saucepan over low heat. Blend in flour salt and pepper. Cook over low heat, stirring until mixture is smooth and bubbly. Remove from heat, stir in milk. Heat to boiling stirring constantly. Boil and stir 1 minute. Sauce will thicken.

Veloute Sauce
2 TBS butter
2 TBS flour
1 cup of chicken broth
1/4 tsp salt
1/8 tsp pepper
1/8 tsp nutmeg

Melt butter in a saucepan over low heat. Blend in flour cook over low heat stirring until smooth and bubbly. Remove from heat stir in broth. Heat to boiling, stirring constantly, boil and stir 1 minute. Stir in seasonings.

Air Fryer Veggie Egg Rolls

I love fried foods. If I could eat them for every meal, I would. But, I also would like to live long enough to see my grandchildren. So we’ve been trying to eat a bit healthier and make some small changes. One of my favorite things to make is egg rolls. But with meat and deep frying, we wanted to try something different. We recently bought a Ninja Air Fryer. I’ve only used it twice so far and I do like it for these two reasons:

  1. The basket and inside parts are dishwasher safe!
  2. The basket is large enough that you can put in an entire bag of frozen french fries at once.

So last night, I decided to try some veggie egg rolls.

cooked eggrolls

Ingredients:

  • Shredded cabbage (about 1 small head)
  • Shredded carrots (to taste, about the proportion you’d use in coleslaw)
  • Finely chopped green onions
  • Chopped zucchini or squash (1 medium-sized)
  • Egg roll wrappers (I use Nasoya brand, available in most grocery stores)
  • Pam Olive Oil

Cut up all the veggies and line them up into bowls to make an assembly line. Get a small bowl of warm water for closing the wraps. See the previous egg rolls recipe for how to assemble the egg rolls. Apologies for my photos here. I was packing these pretty full so mine ended up more square than tubular. It does not affect taste, just looks.

Tip: Don’t assemble all the egg rolls at once. Get four of the egg rolls assembled and starting to cook and then start assembling the rest. By the time you are done with the next few egg rolls, the first batch will be cooked.

Cooking:

You can fit about 4 egg rolls per batch in the basket. (I had one left over for the last batch and squeezed 5 in, but 4 does work better).

eggrolls cooking

I pre-heated my fryer at 390 degrees for 3 minutes – the same as I did for frozen french fries.

Spray the basket with olive oil (vegetable oil works too, but olive is better for you).

Spray one side of your egg rolls with oil. Place the oiled side down in the fryer basket. Then spray the other side of your egg rolls with oil. You don’t need to soak them. Just a light coating.

Play with your fryer. I found one recipe online that suggested 390 degrees for 6 minutes, flip and then do another 6 minutes. My egg rolls looked almost burned after the first 6 minutes doing this. After playing a bit, I found that for my Ninja Air Fryer, the ideal was:

  • 390 degrees for 4 minutes, flip with rubber tongs, and then cook an additional 4 minutes.

Keeping warm:

Since there are 8 minutes for each batch and you end up with about 5 batches, the total time for this takes about 40 minutes. I didn’t want my first batch of egg rolls to be cold by the time I finished. So put them on a pan and turned the oven on. I did mine way too hot at 350 degrees and we had to definitely let the egg rolls cool for several minutes. I’d suggest putting it at about 250 degrees for the egg rolls to keep warm.

Honesty moment:

These were good. They were not as good as the ones I make that are deep fried in a pan full of oil. But the difference was small enough that I can live with it. And that’s the point, isn’t it?

My Favorite Tools for Making Guacamole

My family LOVES guacamole. My husband and I will gladly get table-side guacamole for $8 and then just eat it as lunch (sometimes we each get our own). But I really hated making guacamole at home. I didn’t like dulling my knives, or risking a cut, by slamming the blade into the avocado pit. It was a pain in the neck to get it that right consistency of chunk and mush combo with a big spoon. But I decided to keep at it. Mainly because I got some home-grown avocados from a Florida friend and then Kroger began selling them for 69 to 79 cents a piece. And I have now found the EASIEST way ever to make guacamole. It’s so easy, I’m making it about once a week.

Alton Brown said it best that you should never have a uni-tasker in your kitchen. So I started to look for tools I already had that would make my guacamole experience less of a pain. I came up with two. Here they are.

guac tools
A Potato Masher and an Ice Cream Scoop

Yep, these two things make doing guacamole way easier. So here’s the recipe.

What you need:

  • 4-5 avocados (if you have the big Florida ones, 1-2)
  • 1 small “on the vine” tomato
  • 1/3 onion (red or sweet)
  • 1/2 green pepper
  • 1-2 jalapeño peppers
  • 1 lime (I use the juice from the whole lime)
  • Cilantro (if desired)
  • Sea salt and pepper to taste

Note, You won’t see cilantro in the image above because it’s too much of a pain to wash, dry and chop for me. I love it in restaurant guacamole, but am too lazy to do it in my homemade guac. I don’t think I’m missing much.

guac pit

Chop the onion, peppers, and tomato first and set aside. I’ve been told to squeeze the lime juice into the onion to pickle it prior to putting it into the mashed avocado. I really don’t see a big difference in taste, but there’s a tip for you.

Slice around the entire avocado and then twist to open it so you have two halves. Use the ice cream scoop to scoop out the pit.

guac pretty

Then, use the ice cream scoop to scoop out the avocado. If you’re careful, you get a really pretty avocado half and the

skin looks good too.

Once you have all the avocados out of the skin, put them in a bowl and get ready to mash.

guac stuffYou don’t want to mash these much. I find just putting the masher through each piece once or twice gives me the consistency I like. But do it however you prefer. You can see that I leave mine pretty chunky.

When you stir all the veggies in, it will get a bit more mushed, so keep that in mind. After you’ve mashed it, add in your other veggies and lime juice. Then sea salt and pepper to taste. And yes, you do need to taste it multiple times to make sure it’s ok.

And this is how the guacamole looks after it’s mixed all together. You can see that it does end up a bit less chunky with all the stirring. As for eating, this makes a pretty large helping. Guacamole does not refrigerate well. It is still edible the next day, but it gets brown. So plan on eating it all at once. You can also divide this recipe in half and have enough for sides.

guac finish

Easy “Man in the Yellow Hat” Costume

finished1

Dr. Seuss week snuck up on me again this year. We had a note sent home that the kids needed to dress up as their favorite book character. And of course, I had to get sick that week.

For the past two years, I lucked out and Spencer’s favorite character in pre-school and pre-K was the gorilla from Good Night, Gorilla. (Note: put the kid in a black shirt and pants, black gloves and for the gorilla ears, get small Mickey Mouse clip-on ears you can add to the sides of a black hat.)

But this time, he wanted to pick something different. He chose to be, surprisingly not George, but the Man in the Yellow Hat from the Curious George books.

This is an easy costume to do except for the hat. We already had a yellow shirt. I wasn’t going to bother with yellow pants, and planned on tan khakis but discovered he’d grown out of the pants that fit him a week earlier, so we went with his light gray baseball pants instead. I think it actually worked better than the khakis would have. Use Mom or Dad’s brown socks that can go up to his knees and some hiking boots.

That leaves just the tie and the hat. For the tie, I bought a yellow with black polka-dotted ribbon. Since I didn’t actually want to tie it around his neck and I wanted him to easily be able to remove it if he wanted, I took a bit of elastic and measured loosely around his neck, then sewed the “tie” onto a loop of the elastic. He could easily stretch it over his head and remove the tie. The elastic part was hidden under the collar of his shirt.

dressed1

Now came the hat.

If I had had more time and felt better, I would have been a bit more careful and neat in sewing the underside of the hat, but I wasn’t really feeling up to anything very fancy–(or to ironing his shirt, as you can see in the photo). If he decides to wear this for Halloween (which I’m going to not-so-subtly encourage), I’ll fix the hat–and iron the shirt. And note, this was taken at 7a.m. None of us are morning people. 🙂


What you’ll need:

  • A cheap wide-brimmed garden hat (I bought one on sale from Michael’s store for less than $5) I had considered just re-using my Jessie hat when we dressed up as Buzz, Woody, and Jessie a few years before, but I was glad to not have to damage that hat.
  • Yellow Felt – I bought 2 yards. That was WAY too much. If you’re careful, you could easily get by on 1/2 to 3/4 of a yard. Sign up for coupons from JoAnns. They always have coupons for material. So I got this about 40% off.
  • 2 Air Packaging Pillows – these are those air pillows you get in many Amazon packages.
  • Black ribbon
  • Duct tape – because everything is better with Duct tape.
  • Needle and thread.

First, I took the air pillows and taped them together. Then, I taped that to the top of the hat. This gives you the height of the Yellow Hat.

I played with different ways to drape the fabric around the hat and finally ended up covering the top portion of the hat, then creating a donut-shaped ring to go around the top crown of the hat. I also created a ring to go around the bottom. At this point, I was pretty worn out, so my sewing got a bit messy. But it would be very easy to do a better sewing job on the bottom of the hat. The top looks great. All in all, this project took about 3 hours to do.

Tip on creating the donut-shaped ring. I traced with a pencil around the outside brim of the hat. Then, I just folded that cut-out ring in half and pushed it up against the edge of the crown. I used a pencil to trace about where the inside hold needed to be. Then just made a quick compass using a piece of plastic about the length I needed and going in a circle. It fit perfectly.  No actual measuring needed, everything was eye-balled.

Finally, I wrapped a black ribbon around the crown and called it done.

In Search of the Perfect Breakfast Cookie: Part 1 – Banana and Chocolate

Originally, I was searching for kid-friendly breakfast cookies I could make for my son now that he’s a kindergartner. Sometimes, I think he must be an alien. He does not like pizza, bananas, and absolutely has hated applesauce since he was a baby.

After trying several recipes that he absolutely hated but that I thought were fine, I have given up on finding him a breakfast cookie he liked and started looking for one I liked instead. Luckily, he’s happy with a rotation of peanut butter apples, toast with peanut butter and honey, and cereal in a mug that he can eat on our way to school. My kid LOVES peanut butter.

I learned my eating habits from my mom. My mom was a working mom. She’d be stressed out trying to take care of all us kids as well as get ready for work and get us to school somewhat on time. I remember a few times being handed Little Debbies and being told, “it’s the same as a donut!” So I have not ever had much of an issue with eating junk food in the morning. But that needs to change. And maybe, one day, I’ll be able to convince the kid to eat something as easy as a breakfast cookie so I don’t have to clean up smeared peanut butter from his car seat every day.

Here’s where my journey began a few months back. I went to Pinterest, as every guilt-ridden working mom does. What I discovered is a bunch of complicated breakfast cookies and every single one seems to have bananas and applesauce as a prime ingredient. Two things my kid hates.

But I thought I could trick him. I almost succeeded. My problem was, that all the recipes I found called for flax seed (which we were out of), uncut oats (all I had was Quick Oats), and other healthy things I didn’t have – it’d been a while since our last grocery run. Plus, they all wanted the banana to be the star of the cookie. I needed to cover that taste up as much as possible.

So I looked at a few recipes to see how much ratio of banana to oats might work to hold the thing together and decided to create my own recipe. These cookies actually got a 1/2 a cookie eaten and the comment of “it’s not too bad” from my son. For me, that was a win. For those of us in the house who DO like bananas, we thought these were quite tasty. They were good enough that I didn’t get a chance to take more than one picture.

The next time, I made a recipe that didn’t call for bananas. I’m making a recipe that doesn’t have bananas. You could still slightly taste it.

chocbananacookies

Banana and Chocolate Breakfast Cookie

  • Prep Time: 10 minutes
  • Cook Time: 15-18 minutes
  • Yield: 10-12 large cookies
  • Serving Size: 1-2 cookies

Ingredients: 

  • 4 TBSP Honey
  • 3 1/2 TBSP Oil
  • 2 large eggs
  • 1 tsp Vanilla extract
  • 2 small mashed up bananas
  • 2 cups quick oats
  • 1/4 cup peanut butter
  • heaping 1/2 cup chocolate chips (probably ends up being about 3/4 cup)
  • 2 heaping TBSP Nutella
  • 3/4 tsp cinnamon
  • 1/4 tsp salt

Directions:

Note: You can do this by hand or use a mixer. I used a mixer because I’m lazy. But I tried stirring it, and it’s fairly easy to do.

  1. Preheat oven to 325F.
  2. In a large bowl combine honey, oil, and eggs. Stir.
  3. Add vanilla and mashed bananas. Stir.
  4. Add oats, peanut butter, Nutella, cinnamon, chocolate chips, and salt. Stir.
  5. Use a serving spoon or a 1/4 measuring cup to scoop out a cookie. This should make between 10-12 large cookies.
  6. Bake for 15-18 minutes. Mine took about 18 minutes.

These cookies end up looking a lot like Chocolate Peanut Butter No-Bake Cookies. But remember, these have eggs in them. They need to bake! And because of the bananas and eggs in them, I’d refrigerate leftovers to be safe.

Review: Pump It Up – Knoxville

pumpitup3My son has a winter birthday. That means, we can’t plan on having his birthday party outside. Normally, we just do cake and ice cream at home with the family. But for his fifth birthday, we felt we really ought to have a party. This was a major birthday and would be his last chance at inviting kids he’s spent his entire life with at daycare.

Looking around town, there are several options, Chuck E Cheese, a couple of gym places, but the place that seems to be the post popular with the five-year-old set is Pump It Up.

We’ve been here several times now for friends’ birthdays so decided to go here.

Here are some of the things I really like about it:

  1. There is a time cut off. The parent is not the bad guy telling the kids they have to stop playing.
  2. I don’t have to come up with games for kids to play. Parents just have to watch the kids to make sure no one gets too rough and everyone follows the rules (as closely as a bunch of excited five-year-olds can, anyway).pumpitup1
  3. You have options for different types of parties. Since we were inviting all 20 kids from his pre-k class, plus several kids from church, we went with the package that was two hours and let up to 25 kids (plus the birthday kid as #26) play. I really like that package. You get 1 1/2  hours to play and a 1/2 hour to eat cake and open gifts. The smaller package has an hour of play time and a 1/2 hour to eat. For the difference in price, I’d go with the extra play time, if possible, even if you have fewer kids.
  4. You can bring your own drinks, cake, cookies, fruit, other snacks. They have an option for them providing pizza – but seeing all the uneaten pizza at the other parties I’ve been to, we decided to save that money and just bring our own stuff.
  5. Parents can play too. Yes, watching the 20-something-year-old moms climbing the obstacle course and then discovering that his 40-something-year-old mom couldn’t make the last ladder on it was disappointing, (If I’d had one more hand-hold I could have made it!) but I was more than capable of doing the other slides, bounce houses, and games with my kid. That’s a really fun memory to have.
  6. It’s not outrageously expensive. Comparing two hours of time at Pump It Up to a birthday party at Chuck E Cheese where the kids spend most of that time playing annoying, loud games for tickets, the price is not that bad. Plus, again, my kid doesn’t like pizza. So the idea of having to buy awful pizza for a kid who doesn’t pumpitup2want it is annoying.
  7. The party time. The employees get everything ready. They provide the cups, forks, plates. They clean up. The kids get to watch pictures the employees have taken and feel like stars because they’re on the TV. The employees even give a handy list of what child gave which gift so those of us who still do Thank You notes have something to go by.

What could be better:

Their directions and how to find the building. This place is awful to try to find. The first time I went there, I followed my GPS, which tried to send me a 1/2 mile further down the road. Coming into the building, it looks rather sketchy and there is not a good sign to really tell you that you’ve arrived. It actually appears like you’re going into the back door of the business, rather than a front door. They need a bigger and better sign to let folks know they have arrived. Trying to explain how to get there to my son’s grandparents from Nashville was an adventure, and their GPS also sent them the wrong way.

But that’s really it for what could be better. Just remember, the place is so popular that you have to book about a month in advance – minimum.

I wouldn’t do it every year, partly because I feel like a child shouldn’t have an all-out mega birthday party ever year, but also because it is a pretty big chunk to spend. But, we also didn’t get him a big birthday gift either like we had in the past. And that’s something to think about. Does a kid really need a big gift they will not play with much, or do the experience and the memories matter more?


Disneyland – first impressions

tink-walt-mickey

While I was in Anaheim for Educause this past October, my boss and I got to visit Disneyland on the Friday afternoon when the conference finished. Since we weren’t flying out until dawn the next day, we had an afternoon and evening to see the area. I had never visited a Disney park with a non-family member before, so this was a new experience for me.

rachael-disneyland

As many will say, Disneyland feels a lot like the Magic Kingdom in Disney World. However, it does have quite a few other rides – though we weren’t able to ride several due to them being down in order to decorate for Christmas – including It’s a Small World. This was such a shock to me. At Disney World, decorations seem to happen magically overnight. Disneyland had a much more hometown park vibe than any of the Disney World parks.

One of my goals in going to Disneyland on this trip was to decide if we should make a special trip here for vacation. Verdict – if we were ONLY going to do Disneyland, I would not fly across the country for it. But if we were going to combine that trip with Disney’s California Adventure, the beach, and a partial cross-country jaunt to see the Grand Canyon, Hoover Dam, or Carlsbad Caverns, I’d definitely include it.

I’m fairly spoiled when it comes to Disney parks. We usually plan our Disney trips months in advance, make sure we have meals and rides set up with fast passes. We expect to be able to adjust fast passes on the fly using the My Disney Experience app. Going to Disney World is like going to a park in the 21st century. Going to Disneyland is like stepping back in time to the parks I visited as a kid. It was quaint receiving a paper ticket to get into the park. The idea that they offer hand stamps to allow you to return to the park is old-fashioned. Fast Passes are handled by inserting your paper ticket into a machine and receiving another paper ticket with a return time on it for the ride. It left a good feeling to be able to hand a couple of kids our return tickets for Haunted Mansion at 9 p.m. when we realized we were both tired at 5:30 p.m. and needed to leave the park in order to get up before the crack of dawn the next day. That’s something you can’t do with the Disney World fast pass system.

Disneyland has the feel of a hometown park. And it’s obvious that the majority of people attending are locals. I’d read that you don’t want to visit Disneyland on the weekends. As soon as 5 p.m. came on Friday, the park went from comfortable to crazy busy within minutes. My boss and I both felt boxed in and too crowded. In the short 3 hours that we’d been in the park, we had been able to ride Star Tours, Matterhorn, Pirates of the Caribbean, listen to music on the Mark Twain Boat, listen to the Barbershop Harmony group, shop, and sing along with with a character in Frontierland.  We were not in a rush. We were ambling along and taking the time to look at the art and details. After the locals came, wait times tripled. The only thing we had really wanted to do that we didn’t have time for was ride Haunted Mansion, but between the locals and this being the Friday before Halloween, it was no surprise that fast passes for that ride were rarer than gold.

Just an aside – those who say Pirates of the Caribbean at Disneyland is better than the one at Disney World are correct. It was longer and had more details; I was impressed.

Can you compare Disneyland to Disney World? No. Can you compare Disneyland to the Magic Kingdom? Yes. And a day at Disneyland can be just as much fun as a day at the Magic Kingdom. But, if possible, go Monday through Thursday.

My first Educause Conference

rachael-edu-twitter-smallI had the opportunity to go to my first Educause conference this past couple weeks. I’ve worked in higher education for nearly 20 years and this was the first time I was able to get to go to THE higher ed IT conference of choice. So I was pretty excited to experience it. As  well as bummed I’d miss my family for nearly a week. Though, my boss and I did get to go to Disneyland our last evening in town and I’ll write more about that soon.

Educause is a major conference, having about 4,000+ attendees. At one point, someone announced it was about 8,000. I have to say, it was strange being in the the Anaheim Convention Center with a bunch of higher education people when the last (and only other) two times I’ve been in that convention center was for Blizzcon. Not seeing folks dressed up in black or in cosplay was a bit jarring. It was like seeing the convention/shoemaker’s shop during the day before the elves come out to make the shoes at night.

What I liked:

Choices: There were so many tracks to choose from. There was always an interesting discussion to go to. This actually made it difficult to choose my agenda, though the handy app they provided really helped with that.

Lots and Lots of Choices: This conference had absolutely no dead times for discussions. I’m of the opinion that since my employer, pays for me to be at the conference, then it is my responsibility to get everything I can out of it. It always bothers me seeing people who “attend” a conference and then only go to one panel and then goof off the rest of the time as if it’s a paid vacation. But I have to admit, there have been some higher ed conferences I’ve been to where I’ve struggled through some vendor presentation as it was the only option even closely resembling something that might help me with work and where I’ve spent time checking email to try to catch up on what’s happening in the office. That did not happen here. Every session had multiple options available that made it easy to find topics in every area that I had an interest in. And I didn’t even hit all the topics available.

What could have been better: 

educause-anaheim-convention-centerBecause there were so many interesting topics, and the convention center is so large, it was often difficult to get from the end of one topic to another topic on time. And since some of the sessions were so popular, I’d occasionally arrive to find a sign on the door saying the fire marshal said the room was too full. Several sessions were standing room only, which gets tiring after a while. But, even if a session was full, there was always my #2 or #3 choice that I could run over to. Ganted, I was a few minutes late when this happened, but it was nice having the option for the second and third choices there.

Final Thoughts:

I am really glad I had the opportunity to go to my first Educause. Now, I need to fend off all the vendors who keep emailing and calling me. I truly don’t make the buying decisions, people!

3dpic-straightened
One of two very cool 3D chalk drawings by @traceyleestum